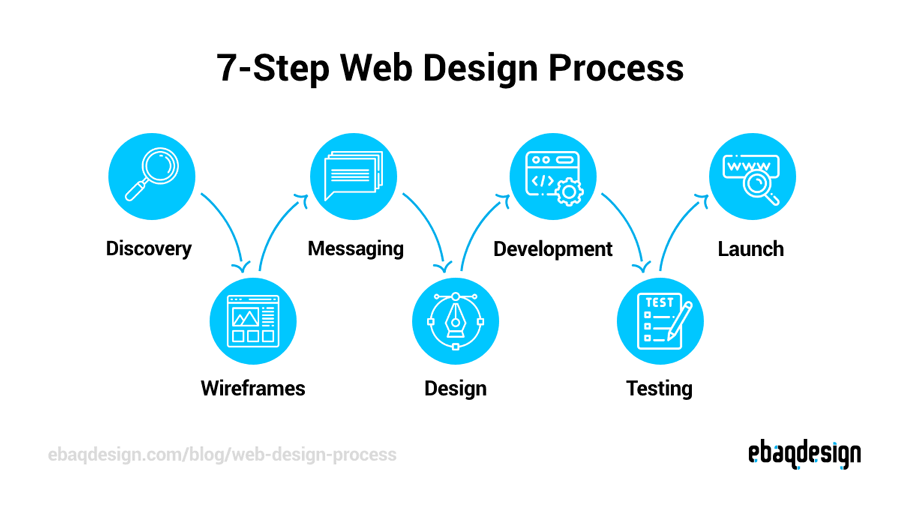
Creating a website might feel overwhelming at first, especially if you’re new to web design. But don’t worry — this step-by-step guide will walk you through how to design a website from scratch, whether you’re a business owner, freelancer, or a creative building your online portfolio.
By the end of this guide, you’ll understand the full website design process — from planning and layout to design and development — so you can confidently build a beautiful, responsive, and user-friendly site.
Let’s dive in!
🧠 Step 1: Define the Purpose of Your Website
Before designing anything, you must be clear about what your website is for.
Ask yourself:
- Is it a personal portfolio?
- A business or service website?
- An e-commerce store?
- A blog or media platform?
Clearly defining the goal of your website helps you choose the right design style, structure, and features.
📌 Pro Tip: Always design with your audience in mind. What do they want to see or do on your site?
📋 Step 2: Plan the Structure & Content
Great website design starts with great planning.
Create a sitemap or list of key pages your site will include:
- Home
- About
- Services/Products
- Portfolio
- Blog
- Contact
Next, outline the content for each page. Think about:
- Headlines and subheadings
- Images or graphics
- CTAs (Calls to Action)
- Forms or buttons
This step ensures your design supports the content — not the other way around.
🎨 Step 3: Choose Your Design Style
Now it’s time to think about how your website will look.
Some popular web design styles include:
- Minimalist (clean, white space, modern)
- Bold and colorful (creative and attention-grabbing)
- Corporate or professional (structured, formal)
Choose your:
- Fonts (use 1–2 maximum)
- Color palette (3–4 brand colors)
- Layout style (grid, centered, sidebar)
📌 Pro Tip: Use tools like Coolors for color palettes and Google Fonts for free web-friendly fonts.
🖼️ Step 4: Wireframing & Prototyping
Wireframes are simple black-and-white layouts that show how your pages will be structured.
You can use tools like:
- Figma (recommended)
- Adobe XD
- Sketch
This helps you:
- Test layout ideas
- Plan element placement
- Save time before jumping into real design
After wireframing, create a visual prototype with real content, colors, and images.
💻 Step 5: Design Your Website
This is the fun part — turning your wireframes into beautiful website designs!
Tips for good website design:
- Keep it clean and uncluttered
- Use consistent spacing and alignment
- Make buttons and CTAs stand out
- Use visual hierarchy (headlines > subheadings > text)
- Ensure accessibility (readable fonts, alt text, good contrast)
📌 Don’t forget to design for mobile first! Most users visit websites on their phones.
⚙️ Step 6: Develop the Website
Once the design is ready, you can develop the website using:
- WordPress (great for beginners)
- Webflow (visual builder)
- Custom code (HTML, CSS, JavaScript)
If you’re not a developer, use page builders like:
- Elementor (for WordPress)
- Wix or Squarespace
- Framer or Webflow
Focus on:
- Mobile responsiveness
- Fast loading times
- SEO-friendly code
- Easy navigation
🔍 Step 7: Optimize for SEO
Design is great — but without SEO, no one will find your website.
Here’s how to make your site search engine optimized:
- Use proper headings (H1, H2, H3)
- Add alt text to images
- Use clean URLs (yourdomain.com/about)
- Add meta titles and descriptions
- Optimize page speed
- Install Rank Math (if using WordPress)
📌 Use keywords like website design, web design process, and how to design a website throughout your content naturally.
🧪 Step 8: Test Everything
Before launching your website:
- Test on different screen sizes (mobile, tablet, desktop)
- Check page speed with PageSpeed Insights
- Make sure links and buttons work
- Check contact forms and popups
Fix any bugs or layout issues before going live.
🚀 Step 9: Launch & Promote Your Website
Once you’re happy with everything — it’s time to go live!
Tips after launch:
- Share on social media
- Submit to Google Search Console
- Ask for feedback from users
- Keep updating and improving content
✅ Final Thoughts
Designing a website might sound like a big task, but when you follow a clear step-by-step process, it becomes a manageable and rewarding journey.
Whether you’re a beginner learning design or a business owner creating your online presence, following these steps will help you create a site that’s not just beautiful — but also functional, responsive, and optimized for success.

